Build & Reno Interior Finish Kit: Choosing Coastal Decor for Home
Coastal decor for home is easier when you have a plan—especially if you’re building a new home or knee-deep in a renovation.
But are you feeling overwhelmed by all the finishes and decor decisions? This one’s for you. Keep reading!
Before we dig in… grab my free Interior Finish Starter Kit to help you stay organized and actually make decisions on tile, flooring, paint, cabinetry, and more. It’s the printable I wish I had when I was buried in samples and didn’t know what to pick. 🌟 → [Grab it here]
You’re running from paint store to flooring center to furniture showroom, trying to keep it all straight. What shade of greige did we pick for the living room again? Is that the right white for the trim? Will this tile clash with the kitchen cabinet color?
Yep. It gets overwhelming fast—especially when you’re trying to coordinate interior finishes and stay true to your vision for my coastal home decor.

The Trick That Helped Me Simplify Interior Finish Decisions
Here it is. Simple, but oh so helpful:
Keep Swatches + Inspo in Your Purse to Nail Coastal Decor for Home
I mean it. Keep your paint swatches, flooring samples, fabric snippets, and inspo pics in your purse. A ziploc bag, zipper pouch, or even an envelope is all you need.
I carried my ziploc sandwich baggie of paint swatches EVERYWHERE while we were building our home—and it stayed there for years after we moved in. If I had a dollar for every time I pulled that out in a store…
Every time I walked into Home Depot, Lowe’s, or a home decor store, I was ready. Want to check if that throw pillow works with the wall color? Boom. Wondering if this rug picks up the right tones from your kitchen island or complements the breezy textures in your coastal decor? Swatches to the rescue.
No guessing. No second trips. No returns. Just confident, quick decisions that actually match your interior finishes and overall home vibe.
Who This Tip Is For:
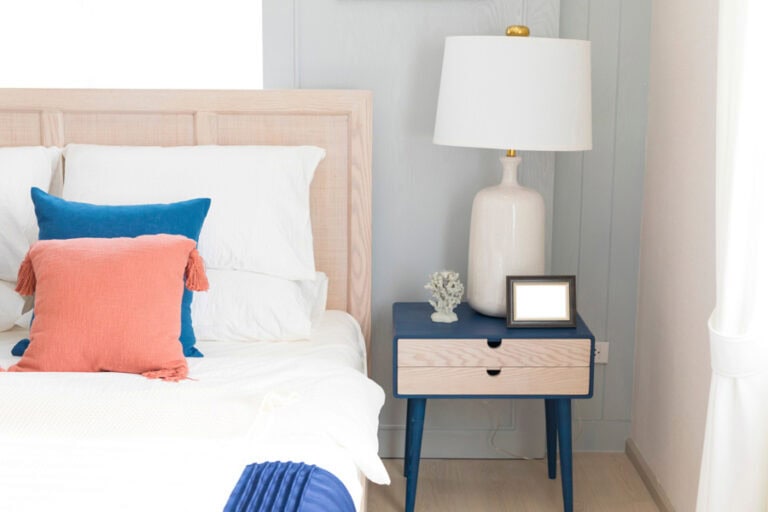
If you’re a busy, overwhelmed homeowner trying to make decor decisions during a renovation or new build, I see you. You’re juggling a million choices—paint, flooring, lighting, finishes—and you want it all to flow. Maybe you’re leaning toward a light, coastal aesthetic (hello soft blues, sandy tones, and natural textures), but your brain is fried trying to tie it all together.
This little sample pouch system simplifies everything.

How to Create Your Interior Finish Kit:
- Gather your home’s paint swatches – Include every color you’re using, plus trim and ceiling colors if those are different. Grab official cards from the store or write down the brand and color name if that’s easier.
- Add flooring and tile samples – If you can get small cuts of your hardwood, carpet, or tile, toss those in. Otherwise, snap high-quality photos in good light.
- Include fabric swatches – Got upholstery or curtain fabrics picked? Ask for small swatches or clip a corner from a sample book.
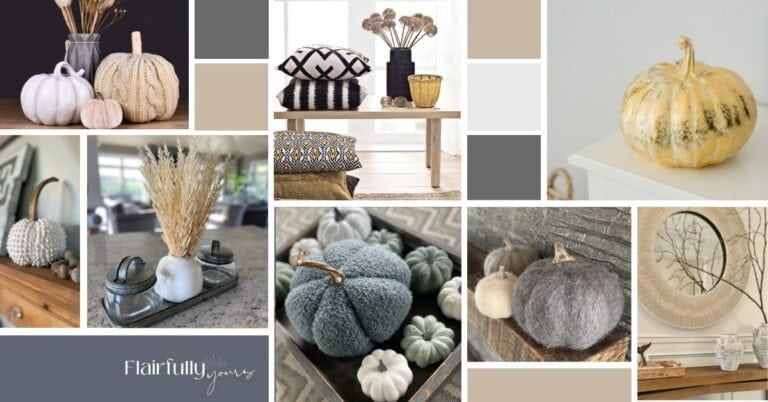
- Print your inspo pics – Include 2–3 printed images of your dream home style—especially if you’re curating my coastal home decor. These images help guide your selections and remind you of the overall look you’re going for.
- Store it all in a zip pouch or mini folder – Keep it compact and easy to toss in your bag. You’ll thank yourself later.
If your head’s spinning from all the design decisions, use the Building or Renovating a House Checklist to break it down into 9 simple tips to keep your choices organized.
👉 Grab it here!

Real-Life Wins:
- Choosing cabinet hardware that matches your faucet finish? Easy.
- Picking out a rug that works with your sofa and your wall color? Done.
- Staying consistent with your interior finishes? Totally doable.
- Avoiding a cart full of “return later” items? Yes, please.
Not sure if you should go with painted cabinets, stained wood, or a little bit of both? I break it all down in this guide packed with real-life tips and visual examples: How to Choose the Right Cabinetry Finish →.
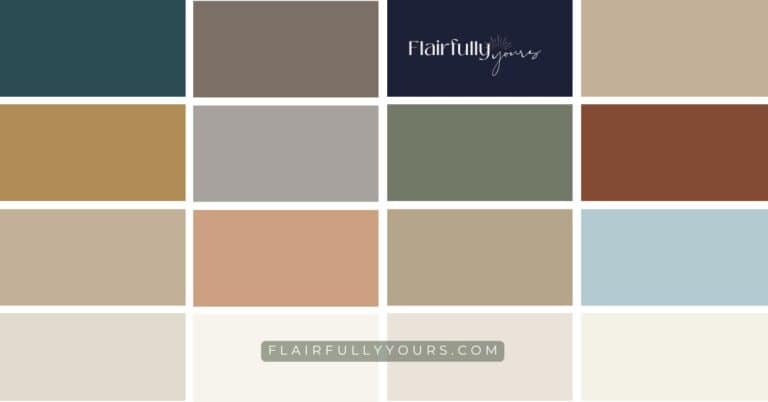
If you haven’t already nailed down your paint colors or overall palette, make sure to check out How to Choose Your Home Color Palette →. It walks you through simple steps to create a cohesive look—especially helpful if you’re starting from scratch or aiming for a calm, coastal vibe.

Bonus Tools to Help You Plan Coastal Decor for Home
While we’re on the topic of being prepared, here are three more things I highly recommend keeping on hand when you’re making home decisions on the go:
1. Keep Key Measurements in a Note on Your Phone
Seriously—this one is gold!
Save dimensions of the rooms you’re working on—including:
- Width
- Length
- Height
- Window placements
- Doorway placement
- Walkway clearance
Don’t forget any built-ins, soffits, or architectural quirks that might affect furniture placement. Plus, must-know sizes like:
- Wall width behind the sofa
- Hallway length (for that elusive runner rug)
- Available floor space for entryway tables or accent chairs
- Dining area size (so you don’t guess on rug or table size)
- Wall height for art, mirrors, or tall furniture
- Window widths for curtains or shades
- Built-in shelving or niche measurements
- Space between kitchen island and surrounding cabinets
- Double-check dimensions for doorways, too—large pieces can be tricky to maneuver in & out if you’re not prepared!

Love this idea? Keep it handy.
You’ll be amazed how many times you’ll refer to these dimensions. That rug you’re eyeing? Might look right in the store… but once it’s home? Womp womp.
Having those numbers on hand means fewer returns and way more yes, this actually fits! moments.
2. Create a “My Home” Album on Your Phone
Before you head out shopping, snap a few pics of your spaces—wide shots, close-ups, awkward corners, anything that helps you remember what’s where.
When you’re standing in front of a gorgeous sectional wondering if it’s too much for your living room, just pull out your phone and get some visual context. It’s the next best thing to having a floor plan in your back pocket.

How to Build a Helpful Album (Not Just a Camera Roll)
Create an album titled “My Home” (or name it after your project!) and drop in:
- A few shots of each room from different angles
- Close-ups of your flooring, wall color, cabinet finish, and hardware
- Any finishes or features that could affect scale or style (beams, built-ins, tile patterns, etc.)
Take photos in natural daylight when you can—it helps you see true colors and texture when referencing them later. (That cozy beige throw pillow might look perfect under store lighting… and totally off once you get it home.)
Bonus tip: Add a few quick notes in your phone (or on a screenshot!) if there’s anything you need to remember—like “this wall is only 50″ wide” or “still need something for above the fireplace.”
This little album turns into your design sidekick—especially when you’re out making real-time decisions and trying to stay true to your coastal vibe without second-guessing every purchase.
Feeling overwhelmed with all the styling choices? You’re not alone. I break down 3 Simple Decor Steps to Make Home Styling Decisions Easier to help you feel more confident, organized, and clear-headed—because decorating your home shouldn’t feel like a full-time job.
3. Keep a “Still Looking For” List on Your Phone
You know those items you know you need (want?!)… eventually, but you’re just not ready to commit to yet? Maybe it’s a pendant light for over the island, a mirror for the powder room, or the perfect bench for your entryway.
Start a running list in your Notes app of those “still searching” pieces, including:
- What you’re looking for (e.g., round mirror for entryway)
- Rough dimensions or size constraints
- Any finishes, colors, or coastal elements you’re leaning toward (or avoiding)
This way, when you’re out shopping and something catches your eye, you’ll know in an instant whether it’s a potential fit.
No more staring at a gorgeous lamp in the store thinking, Wait, do we already have a spot for this? Or missing out on a great piece because you couldn’t remember the size you needed.

Bonus: This list also helps prevent you from impulse-buying decor that doesn’t actually work in your home. (Been there, returned that.)
Seriously, it’s one of those “why didn’t I think of that” tips—and it makes your decorating life so much smoother.
4. Keep a Printed Finish Kit On Hand
Sometimes your phone album and notes app aren’t quite enough—especially when you’re comparing paint chips at the counter or matching samples under real lighting.
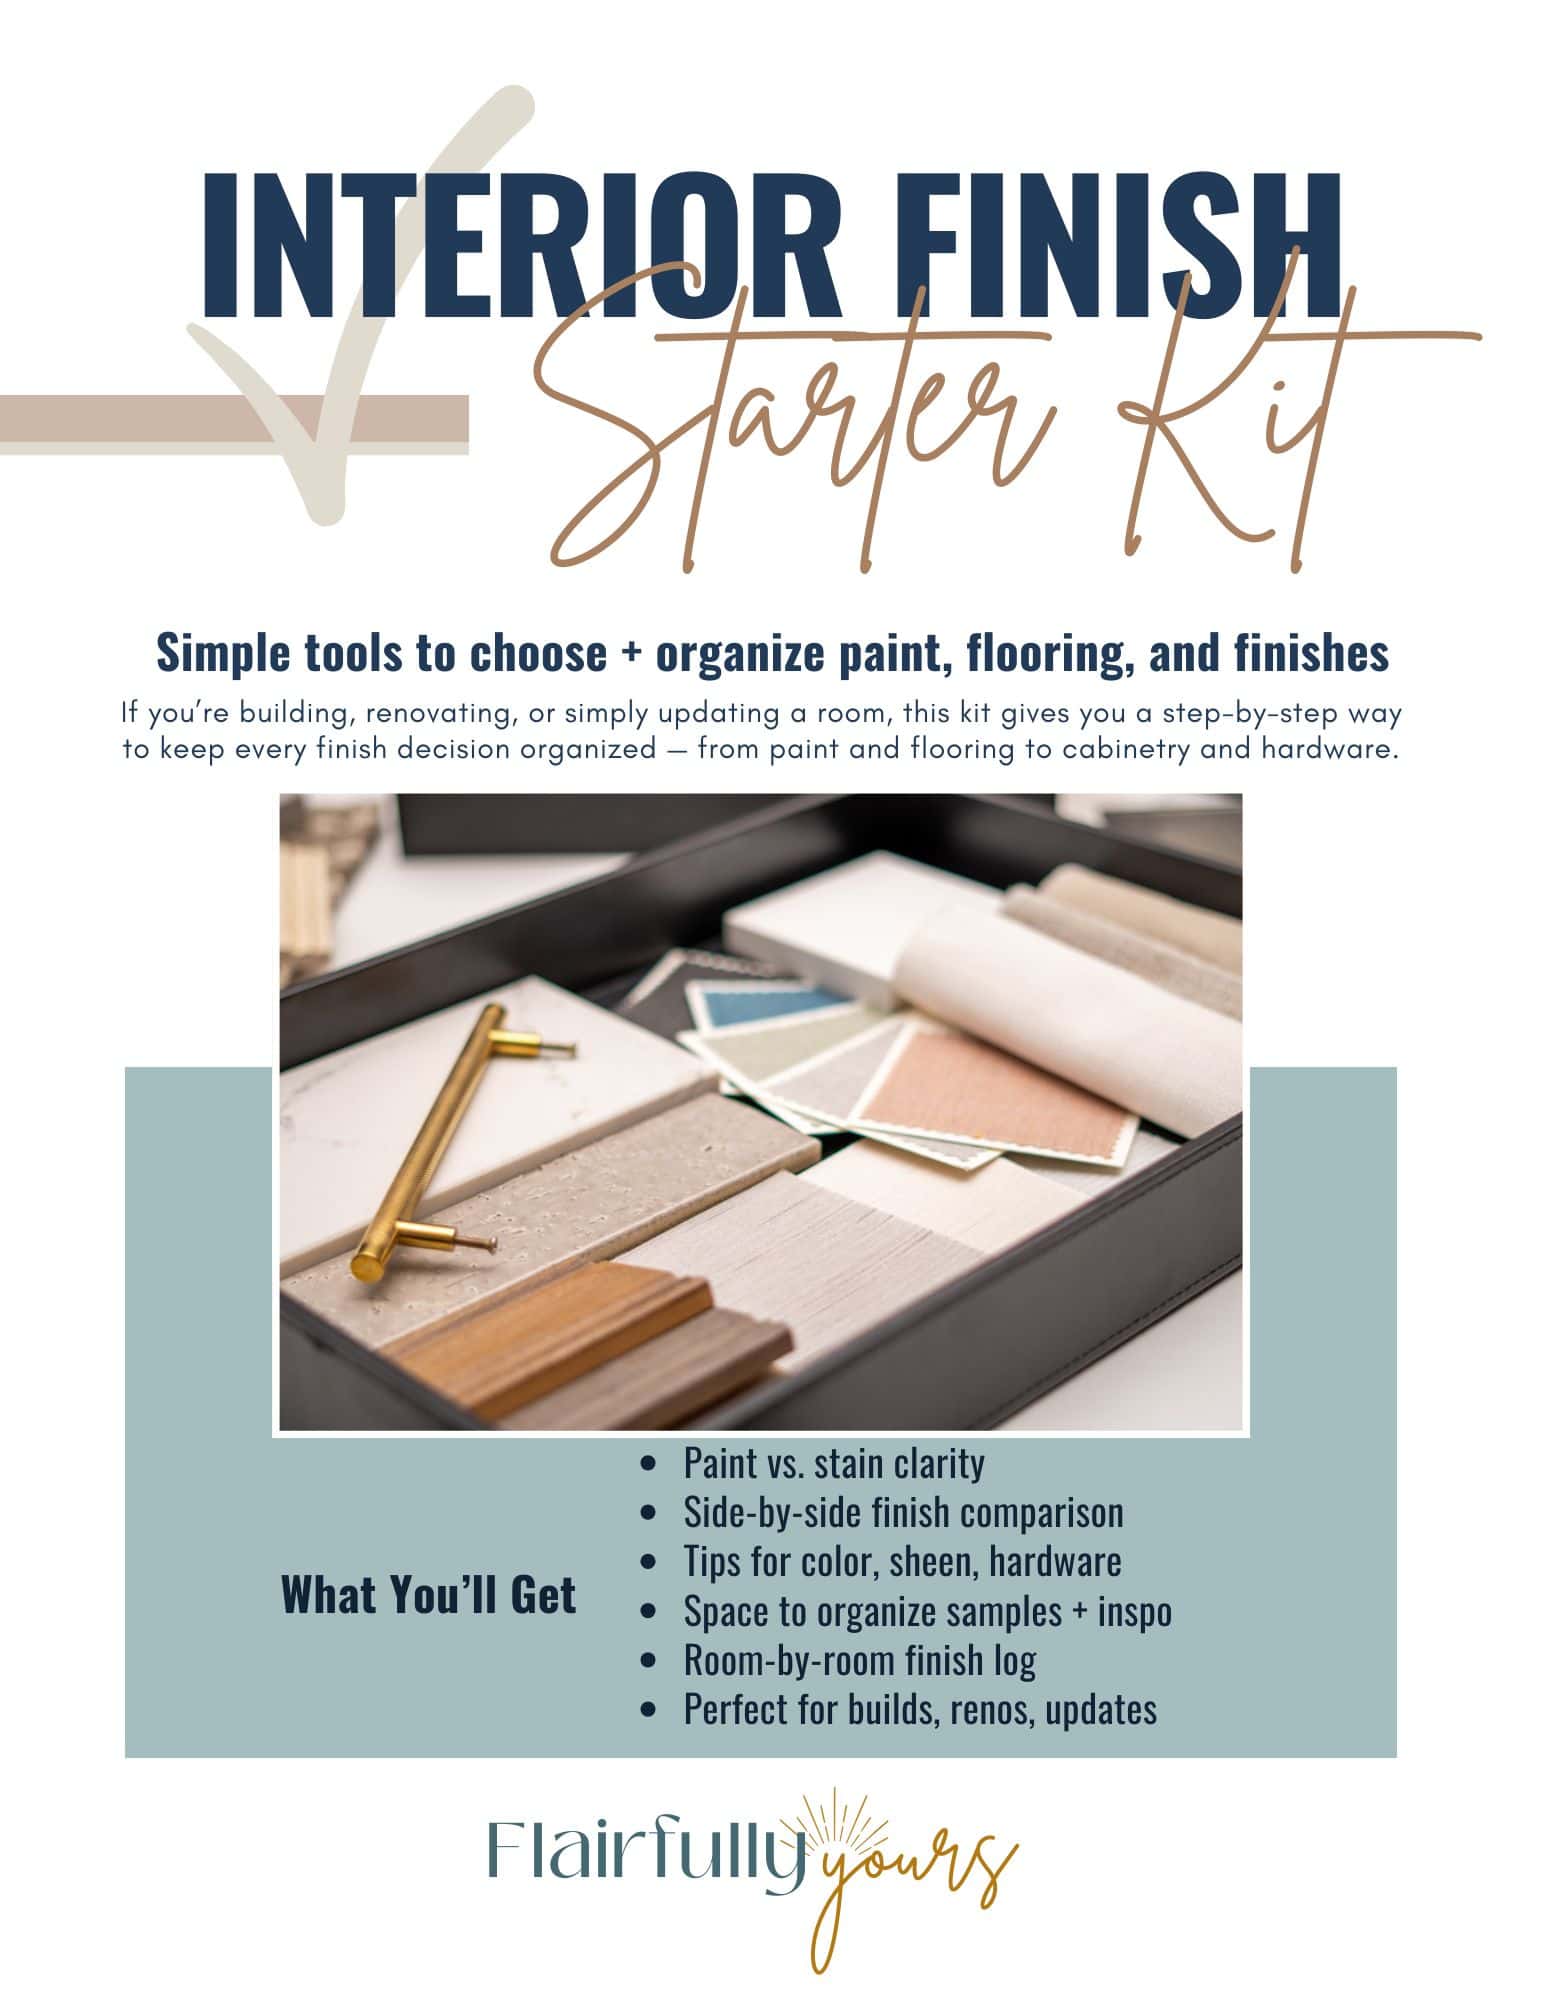
That’s exactly why I created the Interior Finish Starter Kit.
It’s a printable tool that helps you track your favorite samples, compare paint vs. stain options, jot down key details, and finally stop second-guessing your choices.
Whether you’re walking through showrooms or sorting swatches at your kitchen table, having a finish tracker in hand helps you stay focused (and avoid decision fatigue).. Grab it here →
One of the biggest decisions in building or renovating is knowing what will actually work in your home. If coastal style has caught your eye (but you’re not sure it’s right for you), this article helps you decide with confidence.
👉 Is Coastal Style Right for Your Home
Next steps while you’re planning:
- My Building or Renovating a House Checklist walks you through 9 simple tips to keep every color and material working together—from cabinetry and flooring to counters and paint.
→ See the 9 tips here. - If cabinetry is next on your list, my Painted or Stained Cabinets post helps you decide which option fits your home (and how to get the look you want).
→ Read it here. - And when you’re ready to pick paint, my Best Paint Color post shows how to factor in flooring, finishes, and lighting—so everything flows beautifully.
→ Read it here. - Don’t forget about the trim! Trim color plays a crucial role in bringing together your whole coastal look.
→ Find the right hue here.